
Amazon Virtual Private Cloud (Amazon VPC) Fundamentals (Part 1)
Most resources that you provision in AWS require an Amazon Virtual Private Cloud (Amazon VPC). A VPC is your very own virtual network in the AWS Cloud. In this blog, we will go over how to create a VPC, including selection of IP address range, creation of subnets, configuration of route tables and network gateways.
Regions and Availability Zones
Before we build a VPC, we have to pick a region for the VPC. So what is an AWS region? AWS resources are hosted in multiple locations around the world. These locations are composed of AWS Regions and Availability Zones. Each AWS Region is a separate geographic area. A single AWS Region has multiple isolated locations known as Availability Zones. A region has at least two availability zones. The idea is that a disaster in one availability zone will not affect another availability zone. A VPC will span all availability zones in that region. Availability zones are connected and designed for low latency.
 Image from Amazon
Building Our First VPC
The first decision that we have to make before we create our VPC is to choose an IP range. After an IP range is chosen, it’s time to create subnets in availability zones. Once the subnets are created, we have to figure out how to route traffic in our VPC. We finally secure the VPC by allowing and restricting certain types of traffic. Lets get started.
Choosing An IP Address Range
We will only discuss IPv4 addresses in this blog. A word of caution, be careful to pick an IP address range for your VPC that does not overlap with other IP addresses in your network. This includes both cloud and on-premise networks.
What is Classless Internet Domain Routing (CIDR)
CIDR is a notation for describing blocks of IP addresses and is used heavily in various network configurations. IPv4 addresses contain 4 octets, each consisting of 8 bits resulting in values between 0 and 255.
Let’s take an example IPv4 address of 10.0.0.0/16. This IPv4 addresses is broken down into 4 octets, 4 sets of 8 bits.
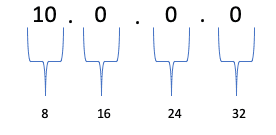
The value that comes after the slash specifies how you will divide the IP block into subnets and available hosts. This is known as a netmask. Going back to our example, the /16 means that the first 16 bits 10.0 is the network address. The remaining 16 bits is for the network portion of the address consisting of subnets and hosts.
A subnet is also expressed in CIDR notation, for example 10.0.1.0/24. This subnet says that the network portion for the subnet is 10.0.1. That is because the /24 is the first 24 bits or the first 3 octets. That leaves the last octet for the device on the network. In theory, a /24 subnet has a capacity for 256 devices. In practice, Amazon reserves the first four (4) IP addresses and the last one (1) IP address of every subnet.
Creating a VPC with Subnets
Let’s recap some of the main concepts we have learned so far.
- You assign a single CIDR IP address range as the primary CIDR block when you create a VPC
- Subnets within a VPC are addressed from these CIDR ranges
- A VPC will contain one or more subnets
- A subnet is tied to a single availability zone within a region
- Creating multiple VPCs with overlapping IP address ranges will prohibit you from connecting these VPCs
- An AWS resource, such as an EC2 instance, will be launched into a specific subnet in the VPC
Using the AWS Management Console to Launch VPC Wizard
We now have enough context to create our first VPC. Let’s log into the AWS Management Console and select VPC from the Services drop down menu. You should see the VPC dashboard similar to this.
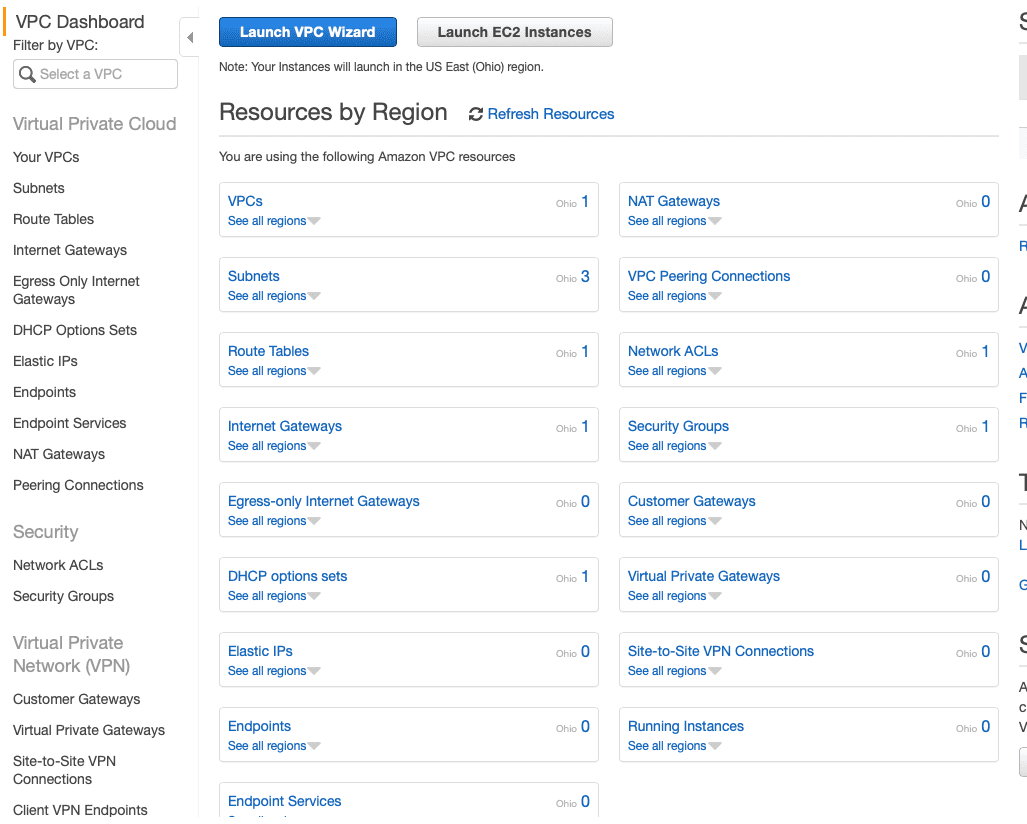
Click on Launch VPC Wizard. This will bring you to step 1 where you can choose the type of VPC to create.
Step 1: Select a VPC Configuration
Select VPC with Public and Private Subnets.

By selecting VPC with Public and Private Subnets, we are going to create a VPC with two subnets. The private subnet is not accessible from the Internet. The public subnet will have direct access to the Internet. We’ll set up security groups and network ACLs for finer grained control over network traffic. I’ll also show you how to set up a NAT Gateway to allow outgoing traffic from the private subnet to the Internet.
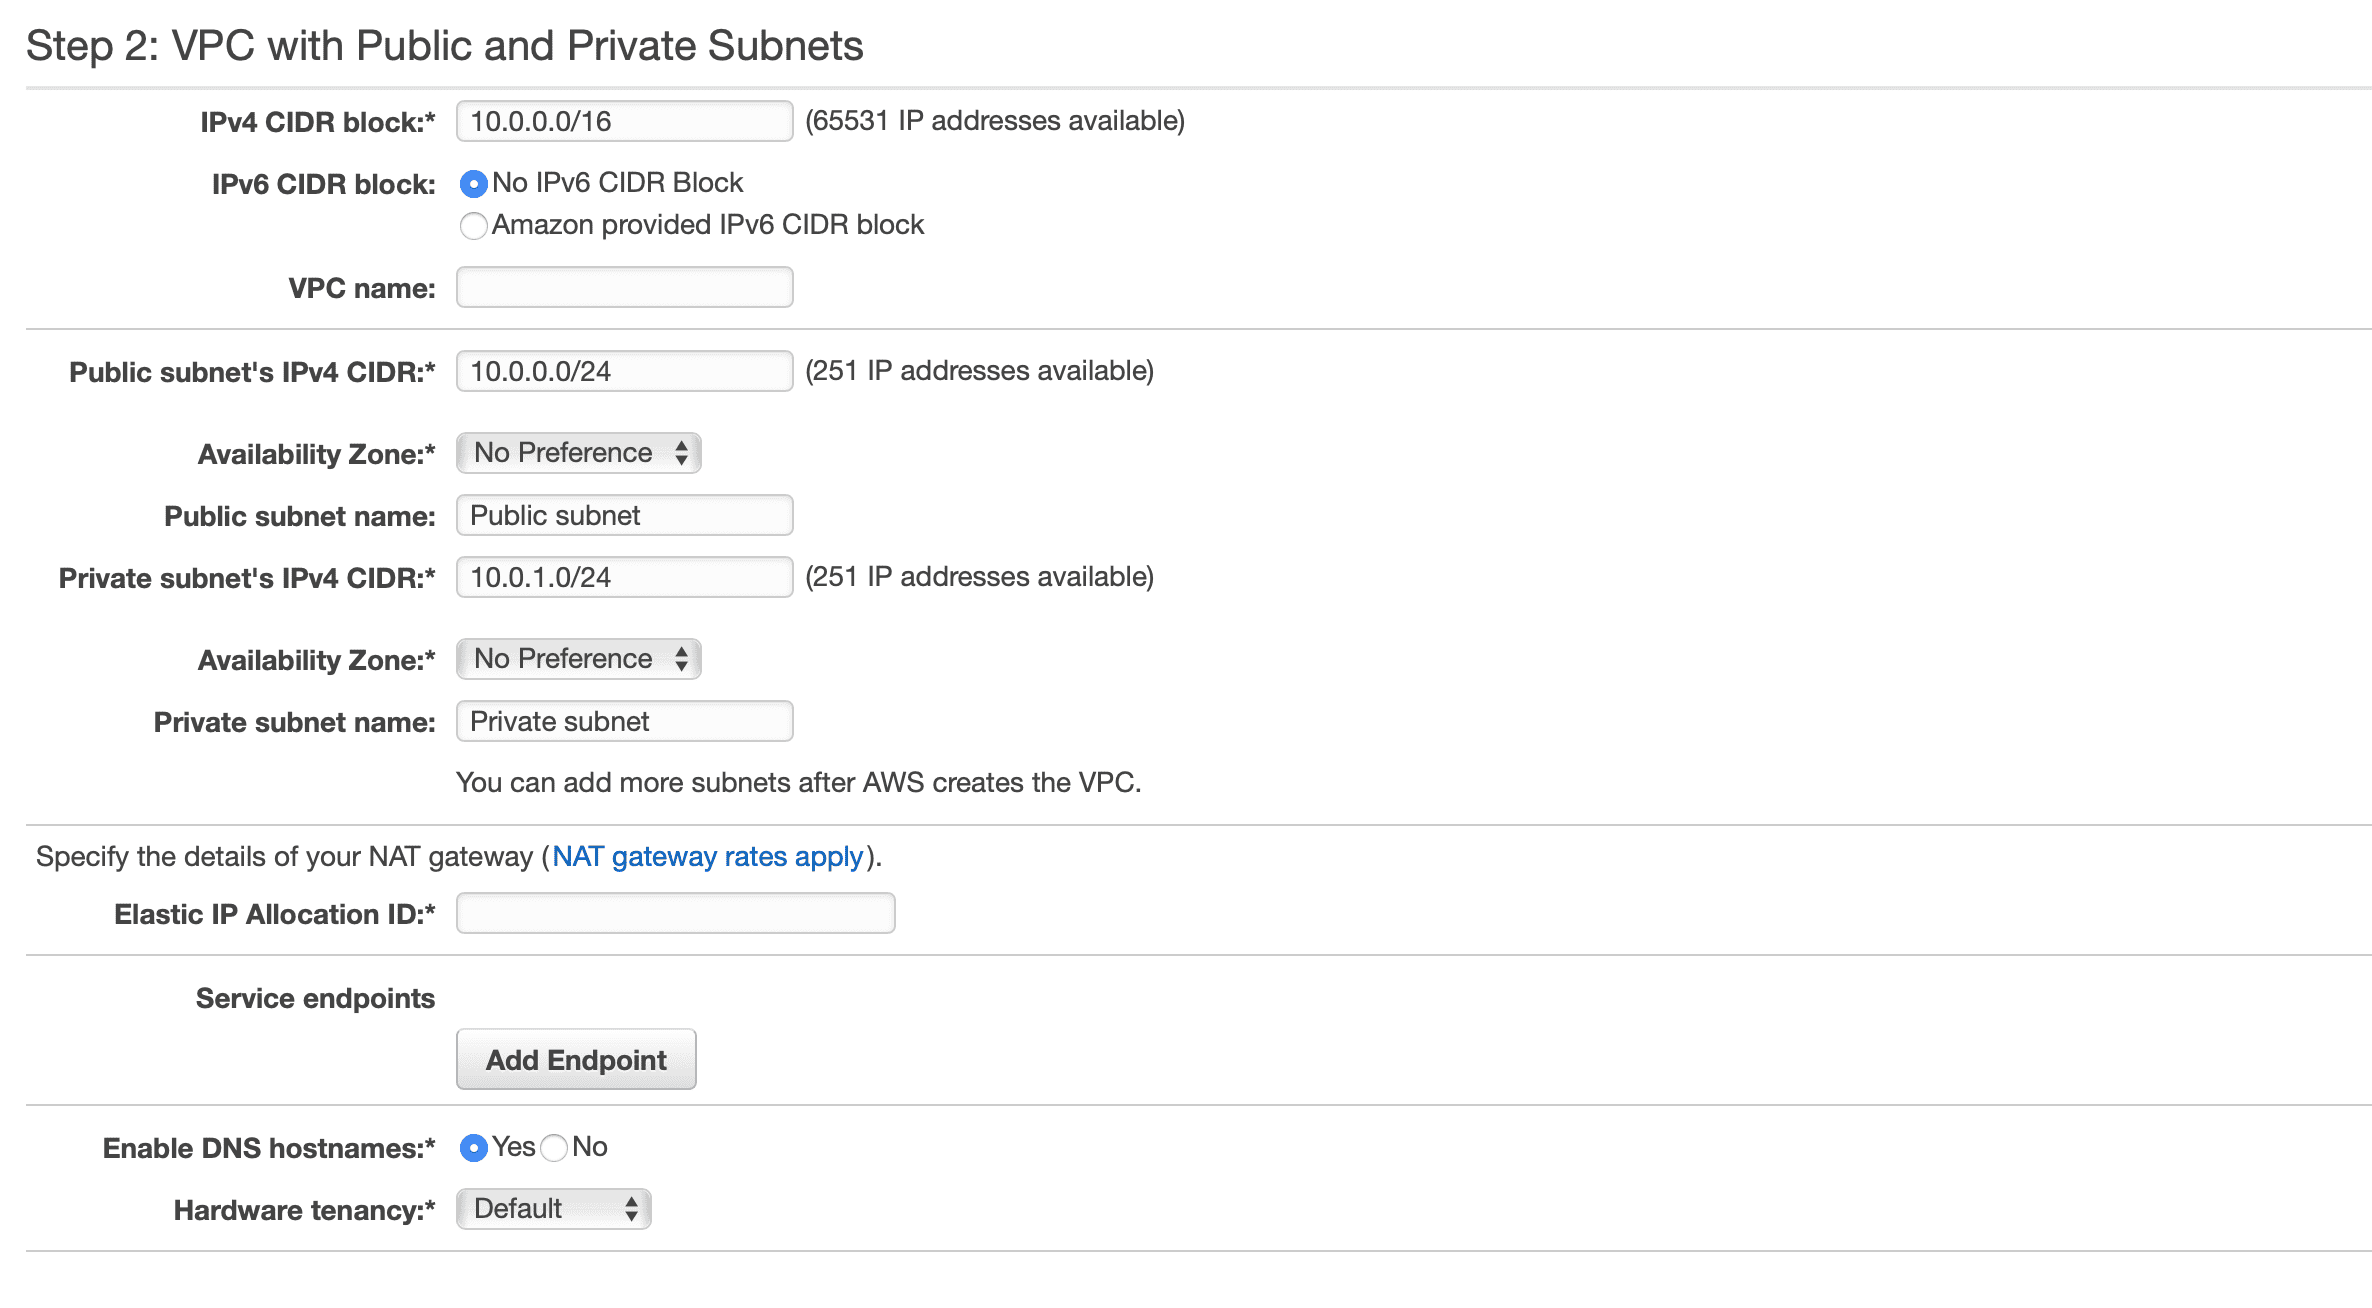
Step 2: VPC with Public and Private Subnets
The next step is where we define the CIDR block for the VPC and the subnets.
Let’s now go through each of the sections.
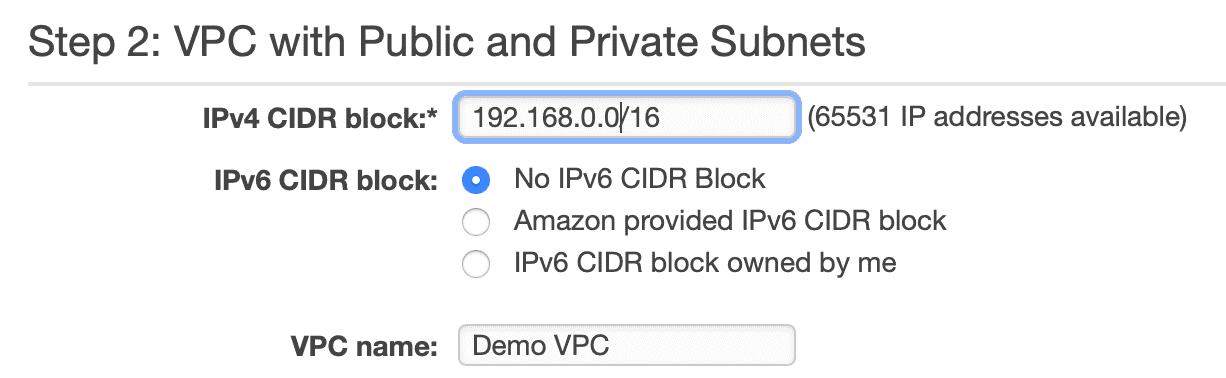
VPC CIDR Block and Name
For this example, we’re going to choose a 192.168.0.0/16 CIDR block for our VPC. The /16 means that the network portion for this CIDR block is the first 16 bits, 192.168. The last two octets, the last 16 bits, gives us 65531 IP addresses for this VPC.
Defining the Public and Private Subnets
We’re going to assign 192.168.0.0/24 for the public subnet’s CIDR and 192.168.1.0/24 for the private subnet’s CIDR. The /24 means that the network portion of the CIDR block is the first 24 bits, that 192.168.0 for the public subnet and 192.168.1 for the private subnet. That leaves the last 8 bits for 251 IP address in each subnet. Remember that I mentioned earlier that Amazon reserves five (5) IP addresses for every subnet.
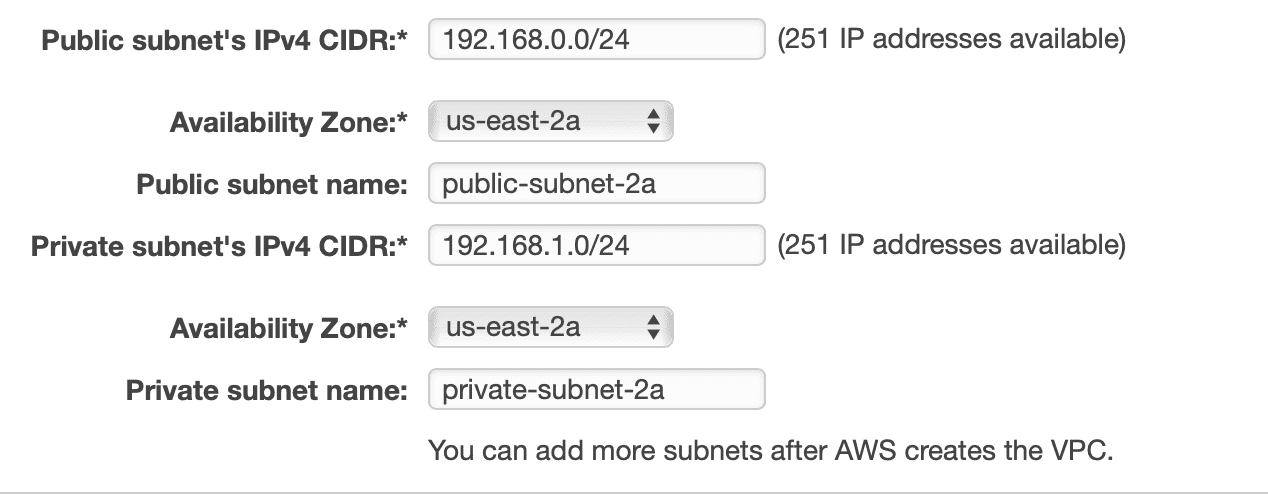
Notice that we explicitly selected the availability zone for the subnets and named the subnets appropriately. Having a naming convention will certainly help you in the future.
NAT Gateway
The next section is where we specify the NAT Gateway. Here we have two choices, a NAT instance or a NAT gateway. NAT Gateways provide the same functionality as a NAT instance. The difference is that a NAT Gateway is an AWS managed service while a NAT instance is an EC2 instance. Will will go with the AWS managed NAT Gateway due to the fact that it requires less administration than the NAT instance.
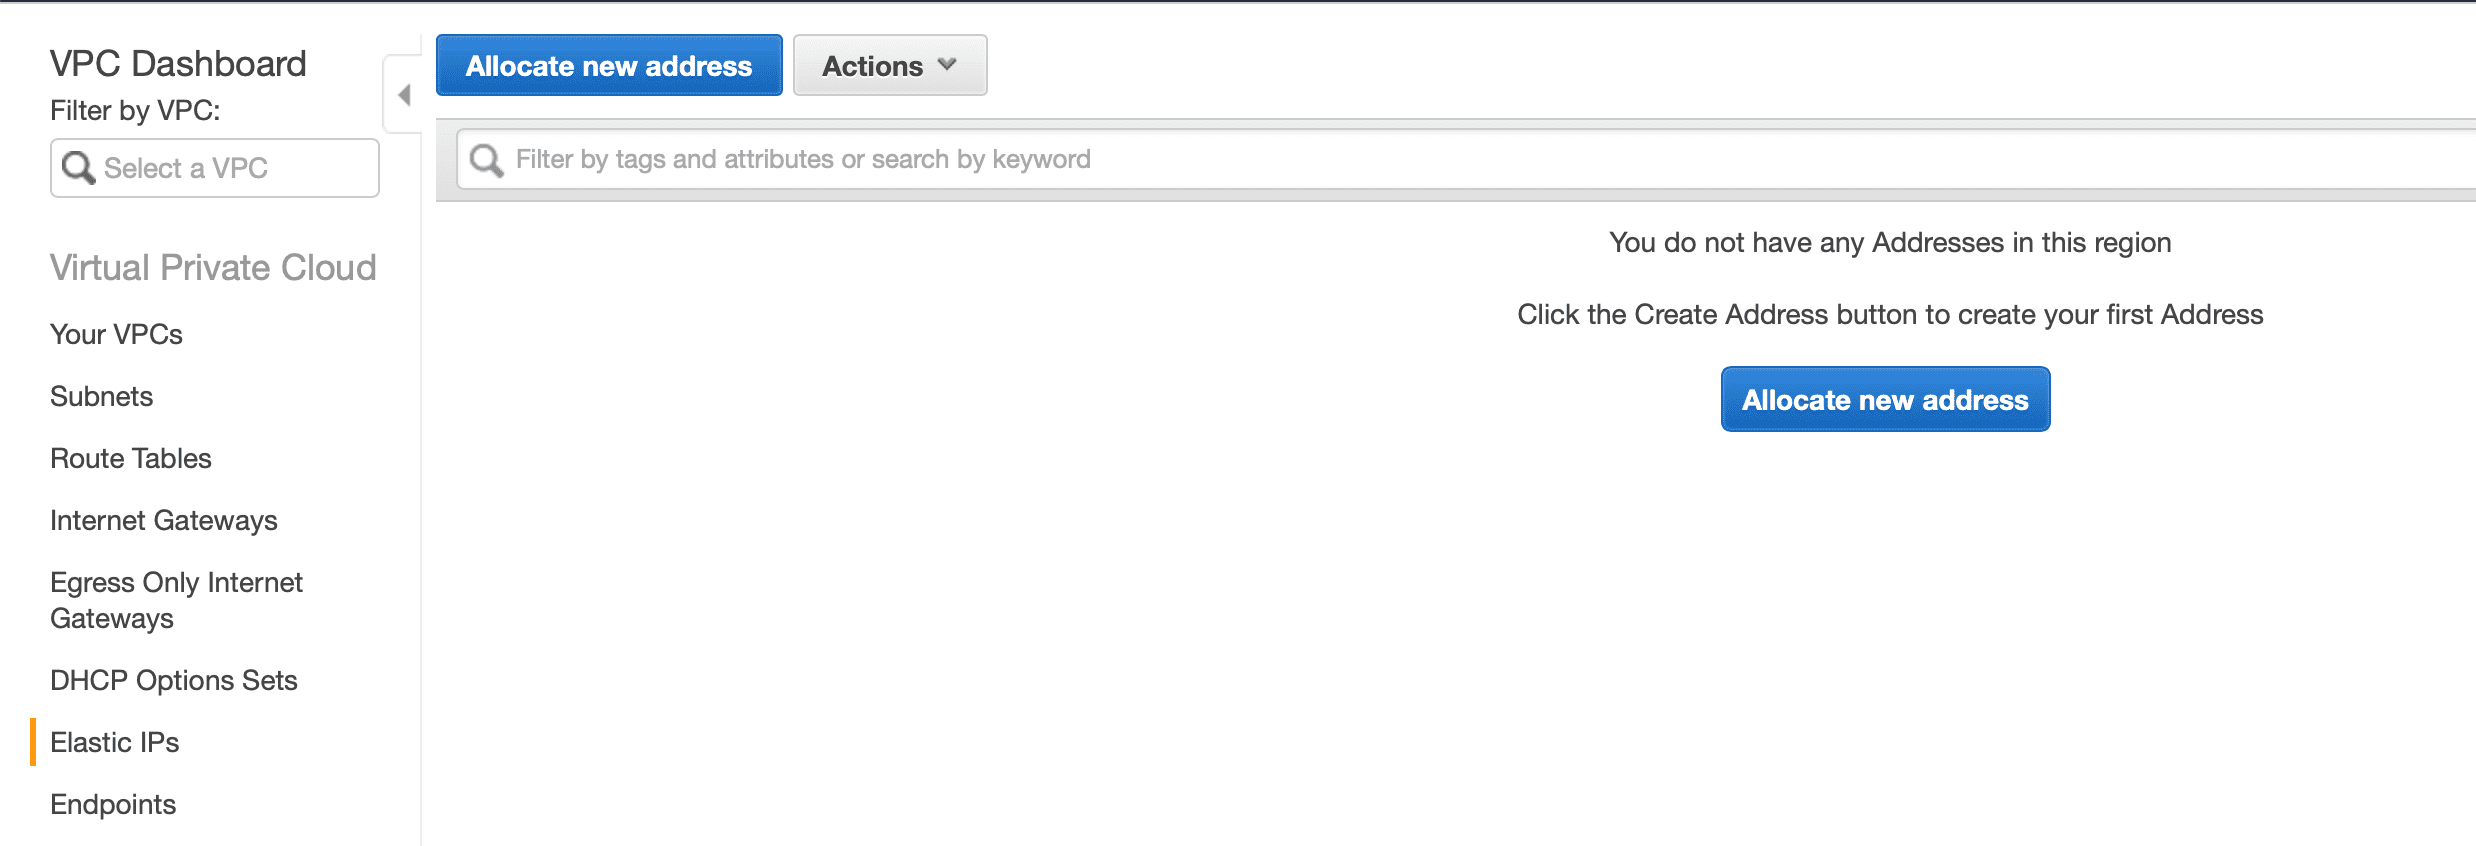
To do that, let’s hop on a new tab and go to the VPC dashboard. From here, we select Elastic IPs from the menu list and click on Allocate new address.
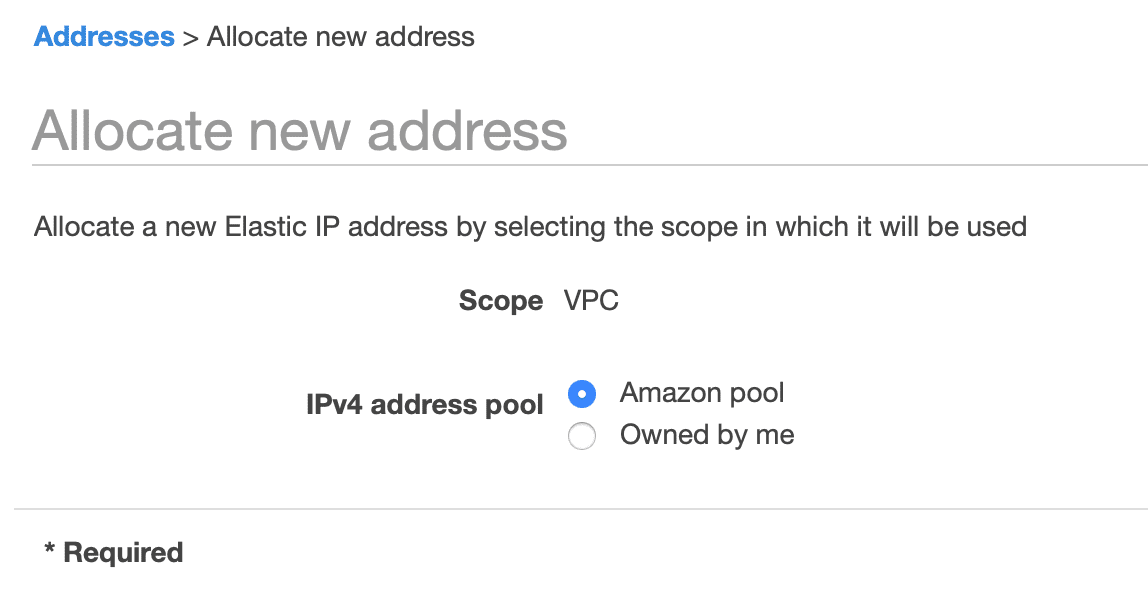
Choose the Amazon pool option and click on Allocate.
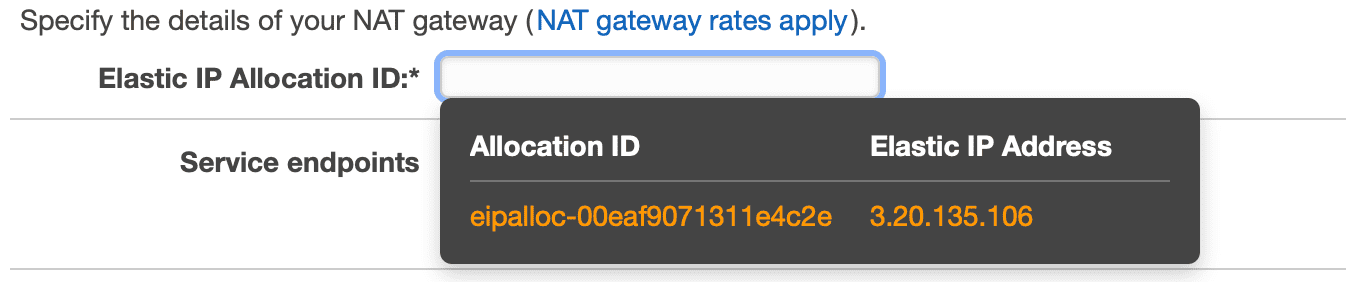
Take note of the IPv4 address since we are going to use it back in our VPC.
Ready to Create the VPC
You’re now ready to click on Create VPC. This may take a few minutes to complete. Once the process is complete, you should see the message VPC Successfully Created. Your VPC should now be visible from the dashboard.

Summary
So far, we created a Virtual Public Cloud within AWS to host our applications. All this, without any upfront cost. We didn’t have to buy any physical servers or run any network cables! Stay tuned for Part 2 when we configure routing and security.